
Today’s topic: Class Playstyles!
We can’t include all possible playstyles in this Dev Diary, as the combinations are almost limitless, but we’ll do our best to give you at least a rough idea about the basics. The basic playstyle of each class is determined by the equipped Weapon and Off-hand Item, its Special Ability, and the selected Active Skills. In [url=https://store.steampowered.com/news/app/1721060/view/4665255575233001768]our second Dev Diary[/url], we already mentioned that the Vanguard class can play with 3 different Weapon Setups depending on the types of weapons you prefer to wield, resulting in 3 different basic playstyles to start with:- [b]1H Weapon + Light Shield[/b]
- [b]1H Weapon + Tower Shield[/b]
- [b]2H Weapon (Greathammer or Greatsword)[/b]
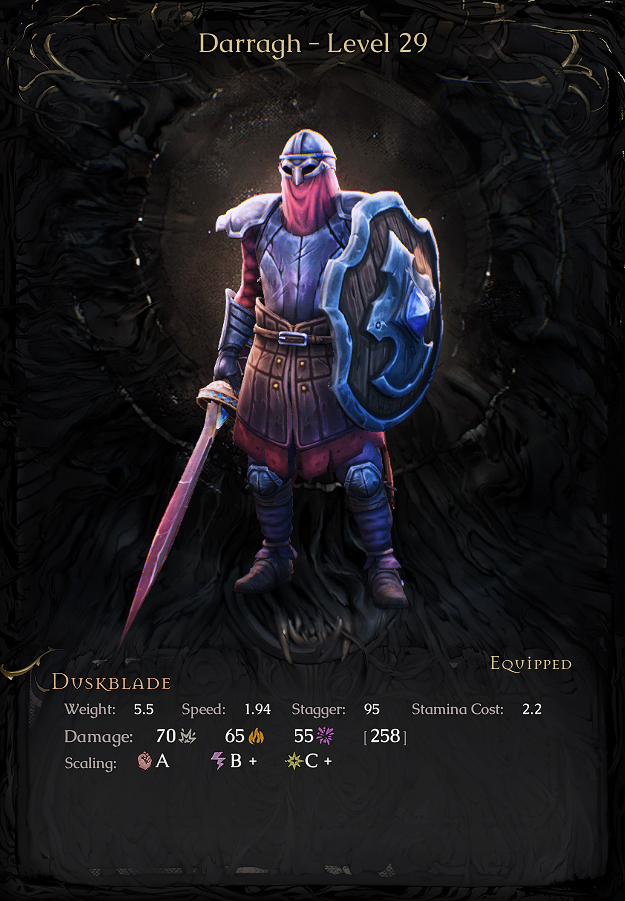
Playstyles of a Vanguard
First, let’s talk about the basics of how this class works. The Vanguard is a melee class focused on Heavy Armor and Shields or 2-Handed Weapons. Its main resources are Adrenaline and Stamina:- [b]Adrenaline[/b] is a resource generated through Light or Heavy Attacks and different Talents, which we went over in more detail in [url=https://store.steampowered.com/news/app/1721060/view/4665255575233001768]our second Dev Diary[/url]. Adrenaline is consumed by most Combat Skills - a subcategory of Active Skills - with the exception of Light or Heavy Attacks. It also decays slowly outside of combat.
- [b]Stamina[/b] allows you to use Combat Skills, and is a quickly regenerating resource used by most attacks and certain movement and evasive actions (like Roll or Evade). While Stamina is depleted, no such actions can be executed until enough Stamina is regained.
 And here are some of the Active Skills that you can use as a Vanguard (please note that numbers are not final):
- [b]Enrage[/b]: Enter a barbaric trance, increasing Physical Damage by 15% but also increasing damage taken by 15%.
- [b]Heavy Attack[/b]: Charge up the attack to deal up to 300% Weapon Damage and generate 40 Adrenaline based on charge up time.
- [b]Uppercut[/b]: Uses up all Adrenaline to deal 120% Weapon Damage and apply Bleed. The more Adrenaline is used, the longer the Bleed effect lasts.
- [b]Whirlwind (requires any 2H Weapon)[/b]: Channel a continuous whirlwind of cleaving attacks around you, dealing 25% Weapon Damage per second to all nearby enemies and slowly advancing forward.
- [b]Shield Charge (requires any Shield)[/b]: Rush forward with your shield, bashing the first enemy hit for 150% Shield Damage and Stagger.
- [b]Defend (requires any Shield)[/b]: Block incoming attacks reducing their damage at the cost of your Stamina. Heavier Shields block more damage and drain less Stamina.
1H Weapon + Light Shield
With this Weapon Set, you gain an additional Special Ability that can protect you from enemy attacks:- [b]Parry[/b]: Parry melee attacks and physical projectiles if timed correctly. Successfully Parrying a melee attack damages and Staggers the attacker. Parried projectiles are deflected instead.
1H Weapon + Tower Shield
With this setup, you can Defend enemy attacks effectively, stun larger enemies with Shield Charge, and you can also use the Tower Shield’s Special Ability:- [b]Inner Strength[/b]: Using Adrenaline charges up your shield. When it is fully charged you can release its charge to deal Physical damage in front of you.
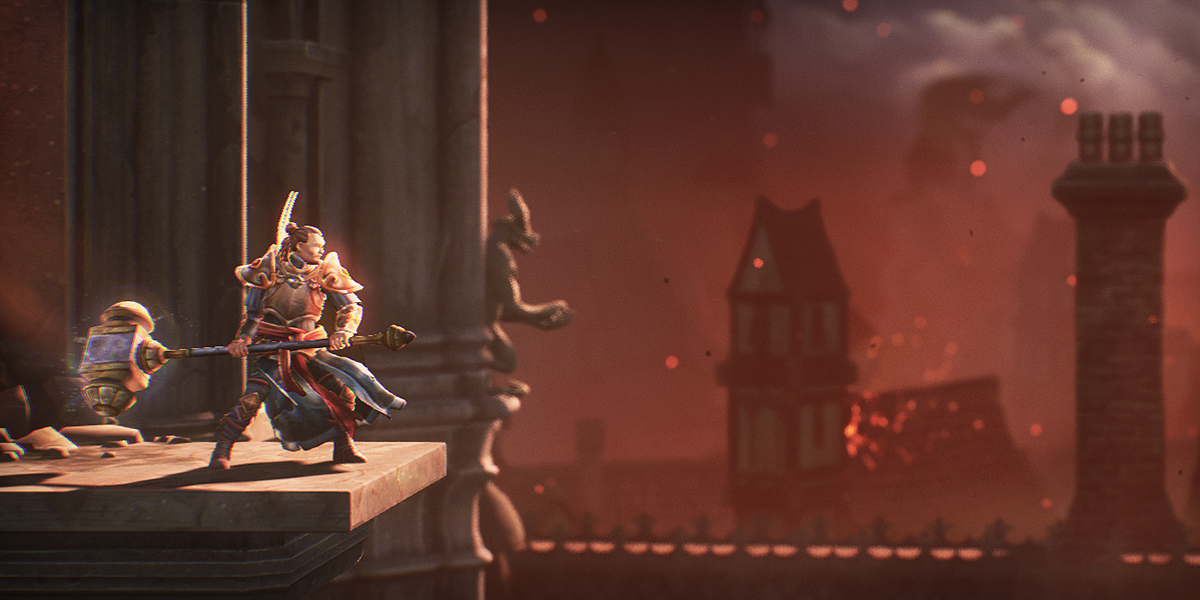
2H Weapon
Greathammers and Greatswords are slow but powerful weapons. Their attack range, damage and stagger is bigger than 1H Weapons'. The effective use of 2H Weapons relies on good timing and positioning against enemies. 2H Weapons also have a unique Special Ability that charges them up when using Adrenaline:- [b]Resonance[/b]: When activated, successful weapon hits create radial shockwaves that expand out from the impact location, dealing damage to all affected enemies.
- [b]Impale & Execute (Greatsword)[/b]: Stabs forward with your Greatsword, dealing 120% Weapon Damage and you can reactivate it again to consume all Adrenaline to do a follow-up strike, dealing bonus damage based on the Adrenaline consumed.
- [b]Sunder (Greathammer):[/b] Leap into the air with a swing of your Greathammer and smash it into the ground in front of you, dealing 140% Weapon damage and sending a shockwave forward for an additional 110% Weapon damage.
Switching Playstyles
Weapon Sets
Your equipped Weapon and Off-hand Item make up your Weapon Set - like a 1H Sword and Shield, for example. As you continue on your travels, you’ll find plenty more - and cooler - weapons and shields, so it may often feel tough to decide exactly what to use in your next battle. Luckily, you always have the ability to create 2 Weapon Sets, and you can switch between them whenever you feel it’s necessary (even during combat!).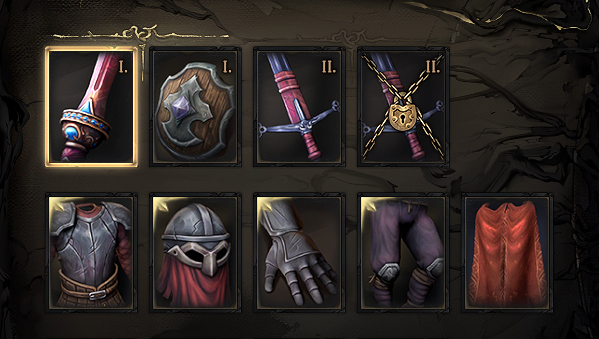 With 2 Weapon Sets available, you can freely choose which to use based on the current challenge - for example, with a 1H Weapon and Shield in one set, and a 2H Weapon in the other, you could:
- Open with a 2H Heavy Attack on an approaching enemy, then switch back to your 1H Weapon and Shield to Defend and Parry…
- …or you could start with 1H Weapon and Shield against a Boss, then switch to 2H and use Uppercut to apply a huge Bleed effect on that Boss!
Active Skill Sets
When changing weapons, you might also want to change your Active Skills. This is no problem, as you will get access to 2 Active Skill Sets, too. In addition, each set can be used freely, so if a combat situation calls for you to combine Weapon Set 1 with Active Skill Set 2, then you can easily do just that! That makes for a total of up to 6 Active Skills usable at the same time.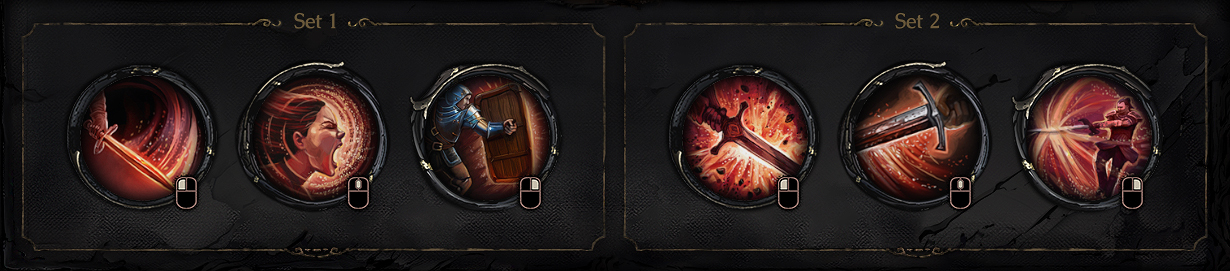 And if you prefer to always set your Weapon Set to match the corresponding numbered Active Skill Set, there is an option to do this in settings: “Combine Skill and Weapon Sets”.
Later in the game, you’ll also unlock the skill upgrade system that allows you to further adjust your Active Skills to better suit a different playstyle. This gives you the option to upgrade your Active Skills with enhanced versions of their existing effects - or by adding completely new effects to them!
And if you prefer to always set your Weapon Set to match the corresponding numbered Active Skill Set, there is an option to do this in settings: “Combine Skill and Weapon Sets”.
Later in the game, you’ll also unlock the skill upgrade system that allows you to further adjust your Active Skills to better suit a different playstyle. This gives you the option to upgrade your Active Skills with enhanced versions of their existing effects - or by adding completely new effects to them!
Playstyles of a Spellbinder
Let’s now take a look at another class, one that isn’t available in [url=https://store.steampowered.com/app/2423720/Mandragora_Demo/]our public demo[/url]: the Spellbinder. This is a fragile ranged caster class, focusing on Chaos Magic. Its starting Weapon Setup is 1H Weapon + Chaos Relic Off-hand Item.
If you’re wondering what exactly a Relic is and does: Relics are Off-hand Items that must be held to allow the casting of Spells of the matching element. In order to equip a Relic, the corresponding Mastery Talent must be unlocked in the Talent Tree, which is the Starting Node for each class Talent Tree - which we talked about more in [url=https://store.steampowered.com/news/app/1721060/view/4665255575233001768]Dev Diary #2[/url].
So in this case, a Chaos Relic would allow you to use Chaos Spells - and also have a Special Ability:
This is a fragile ranged caster class, focusing on Chaos Magic. Its starting Weapon Setup is 1H Weapon + Chaos Relic Off-hand Item.
If you’re wondering what exactly a Relic is and does: Relics are Off-hand Items that must be held to allow the casting of Spells of the matching element. In order to equip a Relic, the corresponding Mastery Talent must be unlocked in the Talent Tree, which is the Starting Node for each class Talent Tree - which we talked about more in [url=https://store.steampowered.com/news/app/1721060/view/4665255575233001768]Dev Diary #2[/url].
So in this case, a Chaos Relic would allow you to use Chaos Spells - and also have a Special Ability:
- [b]Discharge[/b]: Using Mana charges your Relic. When it is fully charged, you can Discharge it to stagger all enemies in a large area, and it also applies the Weakness status effect to them.
- (Weakness reduces the target’s Movement Speed by 25% and increases their Chaos Damage taken by 15% for a short duration. Fun fact: Weakness is not exclusive to Relics, but any Chaos Damage can apply it based on your Weakness Chance.)
- [b]Mana[/b] is a limited resource, which doesn’t regenerate by default, but you can refill it by using various consumables and it is also refilled at checkpoints, also known as Witch Stones.
 Spellbinders also bring some Active Skills to combat. The following Spells can suit almost any playstyle you use (please note that numbers are not final):
- [b]Chaos Beam (Starting Spell):[/b] Channel a beam of chaotic energy that deals 110 Chaos damage per second to the first enemy hit.
- [b]Chaos Vortex:[/b] Channel to rip open the air in front of you, creating a powerful vortex that deals 170 Chaos damage per second to nearby enemies and pulls them towards the center.
- [b]Splintering Sparks:[/b] Open a set of rifts in the air for 8 seconds which fire chaotic sparks at nearby enemies, dealing 42 Chaos damage with each hit. Each rift can fire up to 5 sparks.
Starting Playstyle
At first, you will be limited by Mana, so you’ll need to use your weapon to kill enemies alongside Chaos Beam. As you are wearing Cloth Armor, it is best to peel off enemies from a longer range, then finish them off with your weapon. You really don’t want to get hit! After a while, you will become more Mana-efficient and less dependent on your weapon attacks and you can even just use Spells to kill enemies and bosses. To get to this point, you will need to learn some key Spells and Talents. Now we will be showcasing two specializations: going full caster and nuking enemies from afar, and playing more like a mage assassin. And while some Chaos Spells may better fit one of those styles, you can always mix and match any Spell you prefer and create your own playstyle!Mage assassin-style
This playstyle is great if you prefer to blast your enemies with powerful bursts of magic from short range.- [b]Shadow Shards[/b]: Release a short-range blast of shadowy shards that deals 107 Chaos damage to enemies and pushes them back slightly. Causes high Stagger.
- [b]Dark Echo[/b]: Leave behind a shadowy echo for 10 seconds. While active, you store a portion of your Chaos damage dealt, releasing it as an explosion around you when the effect ends. Reactivate to trigger the explosion early and teleport to the location of your echo.
- [b]Shadow Wisp[/b]: Rip a shadowy wisp from the nearest enemy, applying Weakness to the target in the process. The wisp follows you and strikes enemies with a beam of energy, dealing 80 Chaos damage. The beam chains to nearby enemies affected by Weakness, dealing 20% reduced damage. The wisp has 12 charges.
Full caster-style
This playstyle allows you to attack your enemies from afar before they get the chance to strike their first blow!- [b]Chaos Dice[/b]: Throw a bouncing die that activates on contact with an enemy and provides one of 3 bonuses when collected. The bonus must be collected before a die can be thrown again. The die can grant you either 1 stack of Freecast, 35 Relic Charge, or increase your Spell damage by 100% and your Mana costs by 50% for 10 seconds.
- [b]Chaos Storm[/b]: Conjure a chaotic storm that moves forward and periodically strikes up to 3 nearby enemies, dealing 120 Chaos damage.
- [b]Dark Orb[/b]: Throw a bouncing orb of chaotic energy which passes through enemies and detonates after 5 second(s), dealing 150 Chaos damage in a small radius. Reactivate to detonate the orb early.
Further Possibilities
Chaos Talents
Choosing your Talents to best support your Spells is also something that can help you to focus on your preferred playstyle. As a Spellbinder, here are some of the key Talents you might want to consider:- Inspiration: Casting a Chaos Spell has a 5% chance to grant you 1 stack of Freecast. This chance is increased by 0,1% for each percent of your missing Mana. Freecast makes your next Spell cost no Mana. Channeled Spells become free for the first 2 seconds instead.
- Cripple: Increases your Weakness Chance by 5%. The Slow of your Weakness effects is increased to 40%.
- Chaotic Rejuvenation: Applying Weakness to an enemy restores 10 Mana. This effect has a 1 second cooldown.
- Unstable Trail: Evading leaves a shadowy mark on the ground for 10 seconds. The mark explodes on contact with enemies, dealing 80 Chaos damage in a small radius. This effect has a 10 second cooldown.
- Chaos Tentacles: Casting a Chaos Spell has a 15% chance to spawn chaotic tentacles behind the nearest enemy. The tentacles pull nearby enemies toward themselves and deal 10 Chaos damage per second to affected enemies.
Mixing Elements
Last, but certainly not least, with 2 Weapon Sets available, you could even switch to a Fire Relic and use Fire Spells as well, further tailoring your build to your playstyle. The damage of Fire Spells also scales with your Power attribute so you can set enemies ablaze with similar efficiency. But before you can set everything around you in flames with the help of a Fire Relic, you will also need to know Fire Mastery, which is the name of the Starting Node in the Talent Tree for the Flameweaver class, one of the six included in the full game. In the meantime, here’s a sneak peek at the key Talents for a Chaos-Fire mixed build:- [b]Shadow Burn[/b]: Your Weakness effects also amplify the target's Fire damage taken. Applying a Weakness or Burn effect has a 15% chance to also apply the other one.
- [b]Shadowmelt[/b]: Your Chaos damage deals an additional 5% damage as Fire. Your Fire damage deals an additional 5% damage as Chaos.
